
Yazi - Terminal File Manager
Working in the Terminal The Geeky Way
There are a few reasons why working in the terminal is really handy. Neovim has some great tricks you can do using the keyboard to make working with text super easy and fast. You can save a lot of time coding and with whatever sort of writing by not having to reach for the mouse every ten seconds. I often wish which I had Neovim functionality in a Mac app for my work with text. I did try using a Vim plugin for VSCode but it just kind of got in the way. So to complement using Neovim I saw Yazi as a way to get to the files easy and then edit them in my favourite text editor. Yazi brings the Vim keybindings to navigating my way around the file system of my computer. When I get to the file I want I can press enter or the letter O to open the file and I’m ready to work. You can also open image files and it will open them in the correct Mac app.
Installing Yazi is Easy
I use Homebrew to install Yazi. It is a very simple install. Just run the following command:
brew install yazi ffmpeg sevenzip jq poppler fd ripgrep fzf zoxide imagemagick font-symbols-only-nerd-fontThis installs Yazi and all the dependencies it needs. It is a very easy install. One of the nice things about Yazi is that I can set up a custom keybinding so that I can use it with Neovim. I like the way Yazi works and it is a very simple way to get to the files I want. I can also use customise it to go to a specific folder with the press of a couple of keys. I can get to the folder I use for this blog just by typing the letter g followed by the letter s (Go Spondicous). Or I can get to the home folder by typing gh - (Go Home). Makes sense right?
Customisation of Yazi
The customisation of Yazi is also easy. I made three config files yazi.toml, keymap.toml and theme.toml. Also need a folder to contain the themes called flavors. Only have to get the default settings and then make my changes. All the customisation is done in the TOML files. It’s a very simple way to customise Yazi. I only made a change to have it show the invisible files , although just by pressing the full stop key, dot toggles them on and off. I also changed the setting for the left pane to make it wider.
You get some icons at the left of the file name to help you visually identify the file type.
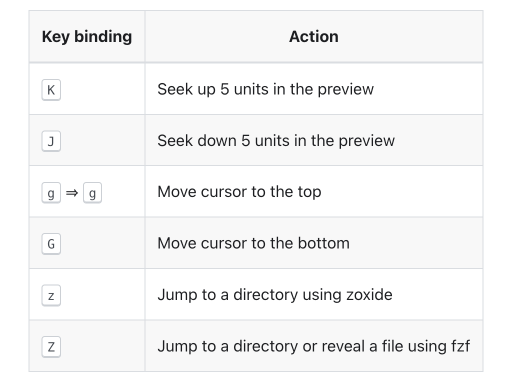
Quick keys to do Stuff
- type cc to get the complete file path
- type cn to get the name of the file
- type cd to get the directory of the file
- type f to filter the files in the current directory do you might want to just see all the json files or files with a certain word in the name.
- / Forward slash Find Next and then use n and N to find the next and previous matches.
- s to search for a file in the current directory with fd
- S to search using rg (RipGrep) looking for text within a file
- ,b to sort by creation
- ,B to sort by creation date (reverse) There are other options for changing the sort order.
- y to Yank (copy)
- p to Put (Paste) Those two are great to get screenshots from the Screenshots Folder and move them to another folder. Like to the folder I use for images for this blog.
- z to use Zoxide to get to the folder I want.
- Z to use FZF to find and jump to files and folders
You Get Help after typing the first character

The More I use Yazi the more I like it
It is proper Good and Geeky to use this Yazi File Manager. I can work with files quicker and more efficiently and not have to reach for the mouse. I just need to practice a bit more to remember the keybindings and then I’m ready to go. Most of them make sense like the go to keys and I can remember easy enough using z and Z for Zoxide and FZF. s and S for the searches. Here are the Yazi QuickStart Docs
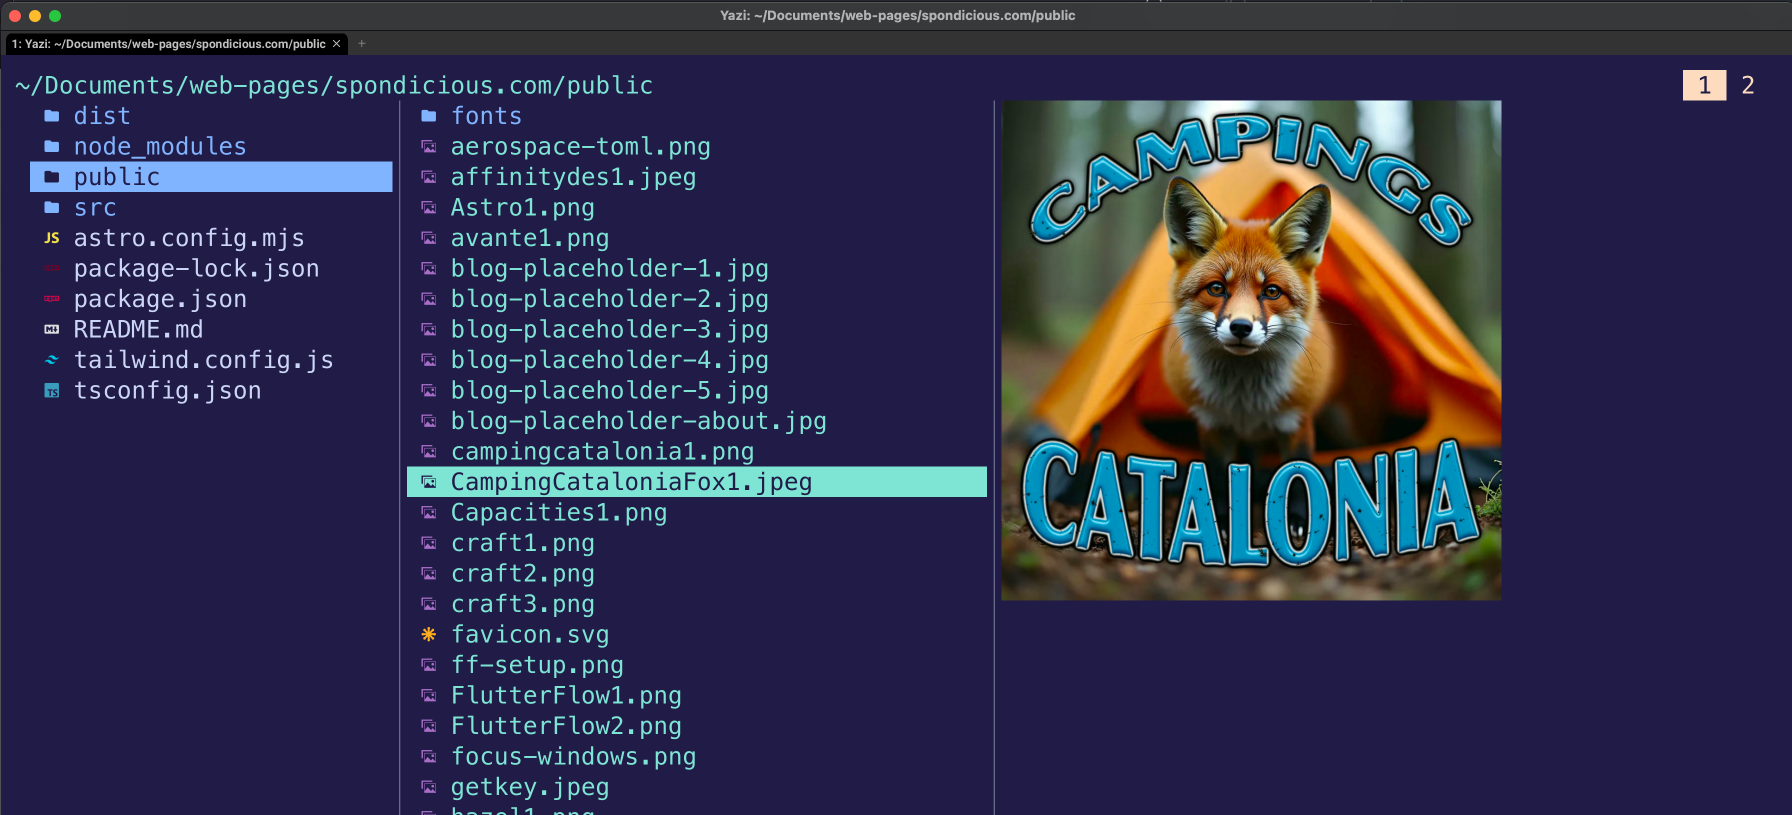
Preview of Images in Yazi
Update 2026-04-24
I wanted better searching in Yazi. I saw a blog post that had good searching set up in Yazi. So I added it to Yazi and this is what I have now. I did enhance it so I got a panel to save me remembering the key combos.

I can hit z to bring up a Search Panel to let me choose which search I want. Some of these are more useful to me than others and I am still finding out how to get the best from it. I like using z j to find the folder I want and then using z s to find the words in the files. At the folder level the results are not so messy. Makes it easier to choose the file I want from the list.
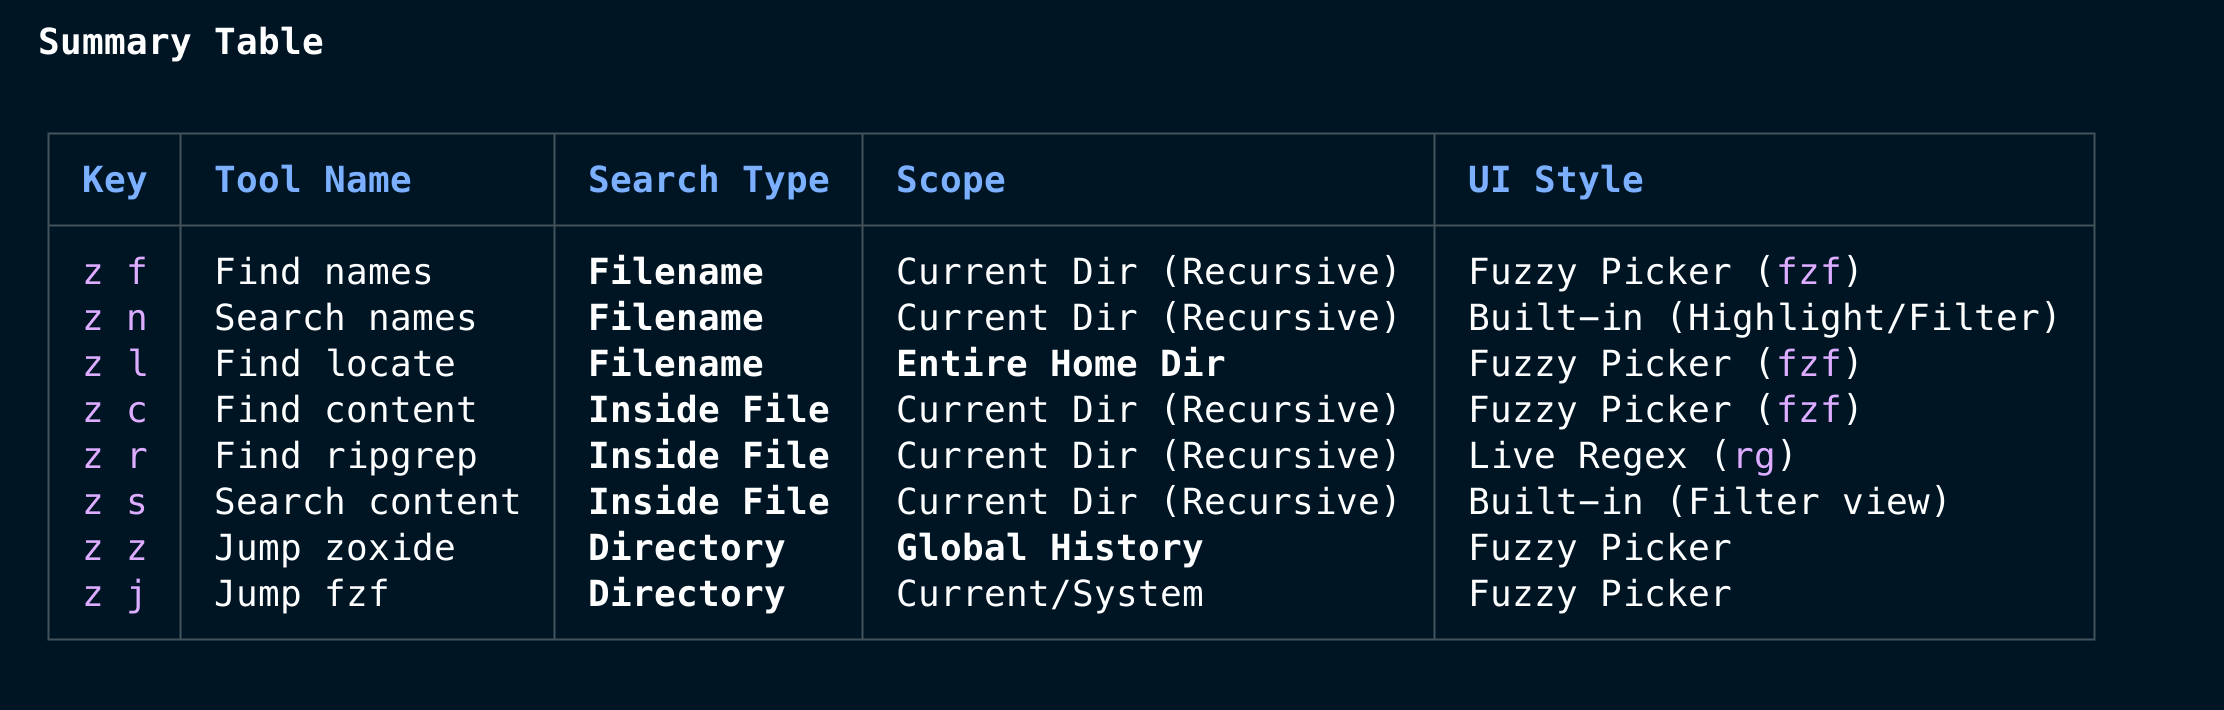
Sometimes it’s good to do the search without the fuzzy finding. If you know the file name and you are in the right folder. Then z n works well to filter out the files.
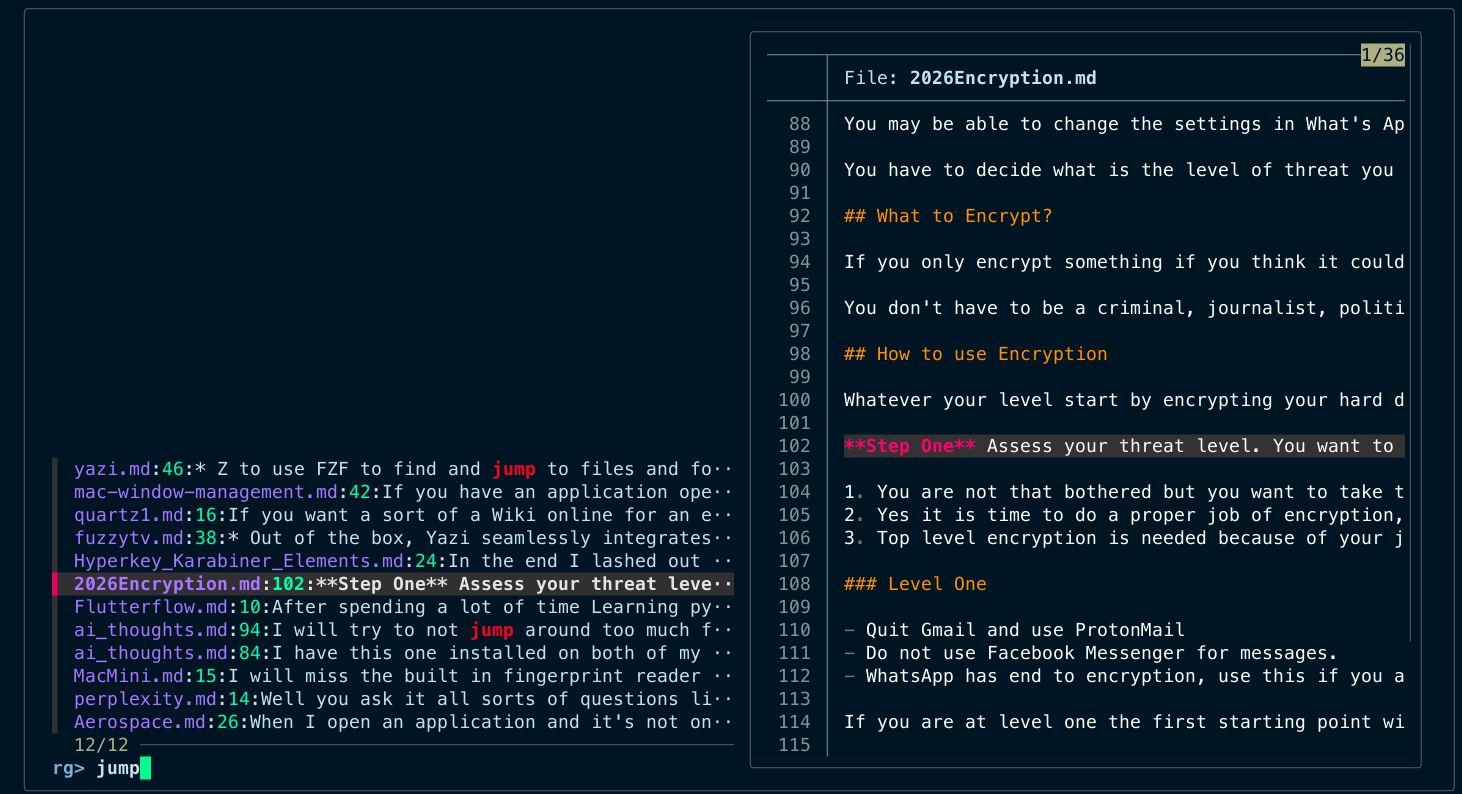
Here I used z r and this is what I got.
So I am happier using Yazi now I have upgraded the search functionality. It will still take a while to get used to the key combinations and I will probably end up favouring two or three of them. Whatever works for me…